I had terrine once several years ago. I thought it was pretty good when I had it so I was eager to try this recipe.
We were given a whole duck to butcher. We reserved the breasts, cutting them in half length-wise. The thighs and legs were deboned and skinned with the meat reserved for grinding. We ground the duck meat with pork fatback through the coarse plate then the fine plate.
 |
| Fatback and duck meat, coarse grind |
 |
| Reserved duck breasts |
We also cubed some ham to mix with the duck and fatback.
 |
| Cubed ham |
Flour, salt, and black pepper were added to the meat mixture, then heavy cream and egg.
 |
| Black pepper, flour, Kosher salt |
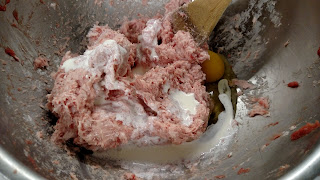 |
| Adding cream and egg |
 |
| Combined ground meat |
The duck breasts were seasoned, then pan fried in butter until medium done. The ham was then browned in the pan.
 |
| Cooking the duck breasts |
 |
| Browning the ham |
The same pan was also used to cook shallots and port wine.
 |
| Cooked shallots and wine |
The meat mixture was combined with the ham and shallot/wine.
 |
| Mix mixin' away... |
We lined a terrine pan with plastic wrap, then sliced ham.
 |
| Ham liner |
Half the meat mixture was added, then the duck breasts in the center. The final layer of ground meat was placed on top, then the ham liner folded over to seal everything up.
 |
| Ready for duck |
 |
| Duck midsection |
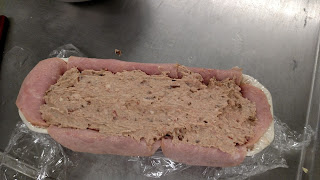 |
| Final layer |
 |
| Ready for the oven |
The terrine was fully sealed with plastic before the lid was placed on it and it was put in a 170 F water bath then into a 300 F oven until the internal temperature was 165 F. This took a little over an hour. The terrine was cooled to an internal temperature of 90-100 F, the lid was removed, weight placed on it, and it was allowed to set overnight in the fridge.
The next day, we removed the plastic wrap and sliced the loaf for plating.
 |
| Ready to slice |
 |
| Cross section |
 |
| Side view |
 |
| Front view |
Prep: A good chunk of time was spent butchering the duck. Other than that prep was straightforward.
Presentation: I sliced the loaf into 3/8" pieces and layered them on top of each other. Some parsley served as garnish for the ends. I'd limit the sliced to one piece for next time and add more garnish or condiments for presentation for a more realistic presentation of terrine at a restaurant.
Taste: The smokiness and salty nature of the ham goes well with the earthy flavor of the duck. The terrine itself was moist and went well with some spicy mustard.
Overall: I'd definitely like to make this again, maybe with some different ingredients, such as a roasted vegetable terrine.


